Thursday, December 12, 2019

VMware vCenter Server Appliance 6.5 and 6.7 Root Password Reset Procedure

Root Password Reset Procedure for VMware vCenter Server Appliance 6.5 and 6.7


      Below steps explains the step by step root password reset procedure for VCSA 6.5 and 6.7. This solution is applicable specifically for VCSA 6.5 and Later versions only. This solution will not work for Earlier versions of VMware VCSA. 

Steps:

1. Take snapshot for VCSA appliance before doing this activity.

2. Reboot the VCSA appliance, press "e" while Photon Screen Appears. 


3. It will redirect to GRUB edit menu.


4. Find the line which start with word "linux", and add the entry "rw init=/bin/bash" at ending of the line after putting a space, Press "F10" to continue.


5. Run the command " mount -o remount,rw /"


6. Run the command "passwd" to change the password. Enter the new password twice


7. Un mount the file system by command "umount /"

8. Reboot the VCSA by the command "reboot -f"


9. Now Root password is successfully reset for VSCA Appliance.


Saturday, December 7, 2019

VMware Horizon 7- Error while attempting to connect to view composer

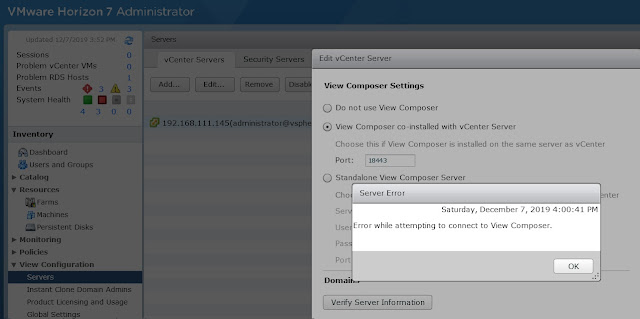
VMware Horizon 7 Gives error "Error while attempting to connect to view composer" While adding View Composer:


Symptoms:

VMware Horizon 7 Administrator give an error "Error while attempting to connect to view composer" while trying to configure View Composer.


Reason:

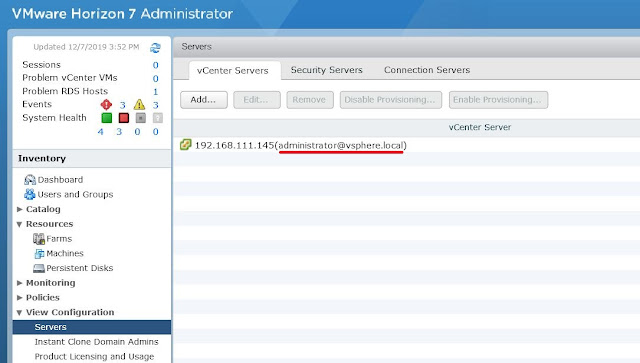
      The User account used to add Vcenter Server on View Administrator don't have sufficient permission on the View Composer. This mostly occurs whenever vCenter is integrated in View Administrator with vCenter SSO Admin, example: administrator@vsphere.local. 


Pre-Requisites Check:

1. If Composer is Co-installed with Vcenter, Always better to install Composer with an AD ID which have administrator privilege in Vcenter local Server and Vcenter Service.
2. Add Vcenter on View Administrator using the AD ID which is used to install composer and should have administrator rights on Vcenter.

Resolution:

1. Go to "Servers > vCenter Servers" TAB. Right Click Vcenter and click "Edit"


2.  Click Edit.
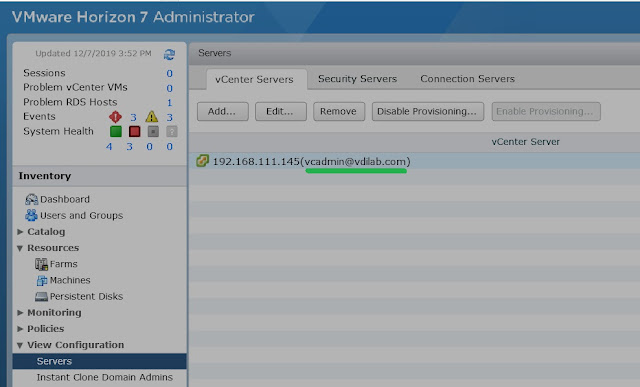
Provide new credential which used for install Composer. Ensure this ID have administrator privilege in vCenter.
Click OK.


3. Now Vcenter Has been added using AD ID which have permission on Composer and Vcenter.


4. Now try to edit composer settings. Composer will be added successfully.


Friday, December 6, 2019

Create Bulk Users in Active Directory via Power Shell

Create Bulk Users in Active Directory via Power Shell


The procedure of bulk user creation in Active directory mainly included 3 Steps.

1. Create A CSV File with Users Information.
2. Create a Power Shell Script
3. Run Power Shell Script.

1. Create A CSV File with Users Information:

Create a CSV file with Users information and ensure the CSV file have at least "Firstname" , "Lastname", "Username", "Password" and "OU" information.


Sample CSV and Script Download Link

2. Crate a Power Shell Script:


Create a Power Shell Script with below codes. Edit only "CSV file location" and "UserPrincipalName" parameter which is highlighted below.

Keep CSV file in a location which is specified in script.

###############Script Start#######################

# Importing AD cmdlets
Import-Module activedirectory
  
#Set $ADUsers variable from file Bulkusers.csv
$ADUsers = Import-csv C:\scripts\bulkusers.csv

#Looping for each user with user information 
foreach ($User in $ADUsers)
{
#Assign data to variable by reading the filed

$Username = $User.username
$Password = $User.password
$Firstname = $User.firstname
$Lastname = $User.lastname
$OU = $User.ou
    $email      = $User.email
    $streetaddress = $User.streetaddress
    $city       = $User.city
    $zipcode    = $User.zipcode
    $state      = $User.state
    $country    = $User.country
    $telephone  = $User.telephone
    $jobtitle   = $User.jobtitle
    $company    = $User.company
    $department = $User.department
    $Password = $User.Password


#Checking User ID already Exist or not
if (Get-ADUser -F {SamAccountName -eq $Username})
{
#give a warning If user does exist
Write-Warning "A user account with username $Username already exist in Active Directory."
}
else
{
#If ID not exit, will proceed with user creation

        #Account will be created in OU specified in CSV
New-ADUser `
            -SamAccountName $Username `
            -UserPrincipalName "$Username@vdilab.com" `
            -Name "$Firstname $Lastname" `
            -GivenName $Firstname `
            -Surname $Lastname `
            -Enabled $True `
            -DisplayName "$Lastname, $Firstname" `
            -Path $OU `
            -City $city `
            -Company $company `
            -State $state `
            -StreetAddress $streetaddress `
            -OfficePhone $telephone `
            -EmailAddress $email `
            -Title $jobtitle `
            -Department $department `
            -AccountPassword (convertto-securestring $Password -AsPlainText -Force) -ChangePasswordAtLogon $True
            
}
}

###############Script End #######################


3. Execute Power Shell Script.

Pre-Requisites:

a) Need to run this script from Machine where RSAT Tools installed.
b) The User should have rights to add Users in AD.

Steps:

1. Open "Windows Power Shell ISE" with "Run As Administrator"
2. Click File > Open and browse to the power Shell script, and click open.
3. Once script is load, click "Green Run button" to execute script.


4. Script has been executed and users are created as per csv file.


Sample CSV and Power Shell Script Download URL


Wednesday, December 4, 2019

Vmware Vcenter 6.0 AD integration steps

Configure AD (Active Directory) Authentication In Vcenter 6.0

      By default, Vmware Vcenter Authentication will be based on Vcenter Single Sign-on (SSO) admin user which we configure during installation. If we want to configure Vcenter with AD Authentication, we have to add AD in identity source configuration in Vcenter.

Steps:

1. Login to vSphere Web Client with SSO Administrator Credential.


2. Go to "Administration > Single Sign-on > Configuration


3.  Open the Tab "Identity Sources"
4. Click "+" icon to add identity source.
5. Select the proper Identity Source Type as per our Vcenter Installation type.


A) Select Identity Source Type as " Active Directory (Integrated Windows Authentication)" if the Vcenter Server is Domain Joined machine.

On Domain Name, Enter "FQDN of Domain Name"

Choose " Use Machine Account" and Click "OK"


B) Select Identity Source Type as " Active Directory As An LDAP Server" if the Vcenter server is a non-domain joined machine.

Name                     : The Display name of Identity Source
Base DN For Users   : Distinguish Name of Domain
Domain Name         : FQDN of Domain name
Domain Alias           : NetBios name of Domain 
Base DN for Groups : Distinguish Name of Domain
Primary Server URL : ladp://<AD_Server>:389
User Name              : AD user which have at least browse permission 
Password                : Password of user.


6. Click "OK"

7. Now we successfully added Active Directory As identity sources.


Configure Vcenter Permission For AD Users:

1.  Go to " Administration > Global Permissions > Manage 
2. Click Green "+" button to add new user or group.


3. Click "Add" to Add user or group from Identity Sources.


4. Choose " AD Domain Name" from drop Down menu.


5. Search User or Group we want to give permission on this Vcenter.
In my example, I am giving Permission for User "vdiuser1"
Select User from search result, click "Add", Click "OK"


6. Assign proper role we want to assign to this user. Choose role from drop down menu, Click "OK"
In My example, I am giving "Administrator" rights to "VDIuser1"


7.  Now AD User "VDIuser1" as been assigned with administrator privilege in this Vcenter.